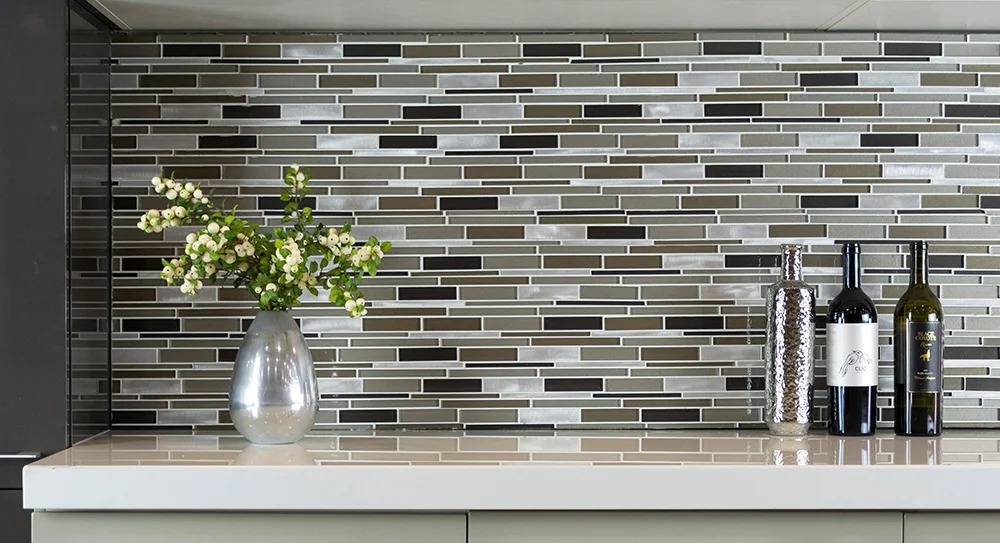
Glass tiles represent one of the most captivating flooring choices available to modern homeowners. These shimmering surfaces combine beauty with functionality, creating floors that literally light up a room. Unlike traditional ceramic or stone options, glass tiles possess unique reflective properties that can make even the smallest spaces feel more expansive and luminous.
The appeal of glass tiles extends beyond their stunning visual impact. These versatile flooring materials offer exceptional durability when properly installed, making them suitable for both residential and commercial applications. From bathroom renovations to kitchen backsplashes that extend to the floor, glass tiles provide a sophisticated finish that elevates any interior design scheme.
However, working with glass tiles requires specialized knowledge and techniques. The installation process differs significantly from standard tile work, demanding careful attention to substrate preparation, adhesive selection, and handling procedures. Understanding these requirements ensures your glass tile project achieves both the aesthetic goals and long-term performance you expect.
The Remarkable Benefits of Glass Tiles
Glass tiles offer several compelling advantages that set them apart from other flooring materials. Their most notable feature is their ability to reflect and amplify natural and artificial light throughout a space. This reflective quality creates an optical illusion that makes rooms appear larger and more open than their actual dimensions suggest.
Enhanced Visual Appeal
The aesthetic possibilities with glass tiles are virtually limitless. Available in countless colors, sizes, and finishes, these tiles can complement any design style from contemporary minimalism to traditional elegance. The translucent nature of glass creates depth and movement that changes throughout the day as lighting conditions shift.
Superior Durability
Contrary to what many assume, glass tiles are remarkably strong and durable. Modern manufacturing processes create tiles that resist cracking, chipping, and wear better than many traditional materials. When properly installed, glass tile floors can withstand heavy foot traffic and maintain their appearance for decades.
Low Maintenance Requirements
Glass tiles are non-porous, making them naturally resistant to stains, moisture, and bacterial growth. This characteristic makes them particularly suitable for bathrooms, kitchens, and other areas where hygiene and easy cleaning are priorities. Regular maintenance typically requires only standard cleaning products and techniques.
Critical Preparation and Installation Considerations
Successful glass tile installation begins with meticulous preparation. The substrate must be perfectly level and stable to prevent stress fractures in the glass. Any imperfections in the subfloor will telegraph through the transparent or translucent tiles, making proper preparation essential.
Subfloor Requirements
A level subfloor serves as the foundation for any successful glass tile installation. Even minor variations can create stress points that lead to cracking over time. Professional installers typically use self-leveling compounds to achieve the necessary flatness before proceeding with tile work.
Installing a crack suppression membrane represents another crucial step. This flexible barrier helps absorb minor movements in the substrate, preventing these stresses from transferring to the glass tiles above. The membrane also provides additional waterproofing benefits in moisture-prone areas.
Adhesive Selection and Application
Choosing the correct adhesive makes the difference between a successful installation and costly failures. Flexible thinset mortar specifically designed for glass tiles provides the necessary bond strength while accommodating thermal expansion and contraction. Avoid mastics and epoxy-based adhesives, as these products lack the flexibility required for glass tile applications and may fail prematurely.
Proper trowel technique ensures adequate coverage and eliminates air pockets that could compromise the installation. Use a notched trowel appropriate for your tile size, and back-butter each tile to guarantee 100% adhesive coverage. This extra step prevents hollow spots that could lead to cracking under load.
Professional Cutting and Handling Techniques
Working with glass tiles requires specialized tools and safety precautions. The material's hardness and potential for creating sharp edges demand careful handling throughout the installation process.
Cutting Methods
A high-quality wet saw equipped with a diamond blade designed for glass provides the cleanest, most accurate cuts. The continuous water flow keeps the blade cool and reduces dust while minimizing the risk of chipping. For smaller projects or detailed cuts, experienced installers may use scoring tools, though this technique requires considerable skill to execute properly.
Safety Protocols
Eye protection is non-negotiable when cutting glass tiles. Flying particles can cause serious injury, making safety glasses or face shields essential equipment. Handle cut tiles carefully, as fresh edges remain extremely sharp. Smooth any rough edges with fine-grit diamond hand pads before installation.
Store cut tiles safely away from foot traffic, and dispose of waste materials properly. Glass tile scraps can create hazardous conditions if not managed appropriately throughout the project.
Curing and Grouting Procedures
The curing period following tile installation plays a critical role in achieving long-term success. Rushing this stage can compromise the bond strength and lead to failures down the road.
Proper Curing Time
Allow the installation to cure for 24 to 48 hours before beginning grouting operations. This waiting period ensures the adhesive develops sufficient strength to support the grouting process without disturbing the tile placement. Environmental factors such as temperature and humidity may extend the required curing time.
Grout Selection and Application
Not all grouts work well with glass tiles. Traditional sanded grouts may scratch the surface during installation, while some polymer-modified grouts may not cure properly against the non-porous glass surface. Always consult manufacturer recommendations for compatible grout products.
Apply grout carefully using diagonal strokes to ensure complete joint filling. Clean excess material from the tile surface frequently using a barely damp sponge, taking care not to disturb the grout lines. The transparent nature of glass tiles makes any residual grout haze highly visible, so thorough cleaning during application prevents later problems.
After the grout cures completely, apply an appropriate sealer to protect the joints from moisture and staining. This final step ensures your glass tile installation maintains its beauty and performance for years to come.
Transform Your Space with Expert Glass Tile Installation
Glass tiles offer an unparalleled combination of beauty, durability, and functionality that can transform any space into something extraordinary. The reflective properties that make rooms appear larger and brighter, combined with the endless design possibilities, explain why these materials continue growing in popularity among discerning homeowners.
Success with glass tile projects depends heavily on proper preparation, appropriate materials, and skilled installation techniques. The specialized requirements for substrate preparation, adhesive selection, and handling procedures make professional installation a wise investment for most homeowners.
At Creative Floors, our experienced team understands the unique challenges and opportunities that glass tiles present. We bring the knowledge, tools, and techniques necessary to ensure your glass tile project achieves both the stunning visual impact and long-term performance you desire. Contact us today to explore how glass tiles can transform your space and discover why proper professional installation makes all the difference in achieving exceptional results.
Frequently Asked Questions About Glass Tiles
Glass tiles offer exceptional benefits for Aurora homeowners looking to enhance their spaces. Their reflective properties naturally amplify both natural and artificial light, making rooms feel larger and more open particularly valuable in Chicago-area homes where maximizing natural light during winter months is essential. Glass tiles are non-porous, making them resistant to stains, moisture, and bacteria, which is perfect for Aurora's humid summers and cold winters. When professionally installed, they're remarkably durable and can withstand heavy foot traffic while maintaining their stunning appearance for decades.
Yes, glass tiles are surprisingly durable when properly installed. Modern manufacturing processes create tiles that resist cracking, chipping, and wear better than many traditional materials. They're suitable for both residential and commercial applications throughout the Aurora area. The key to their longevity lies in professional installation with the correct substrate preparation, appropriate adhesives, and proper handling techniques. At Creative Floors, we ensure your glass tile installation can withstand the demands of busy households while maintaining its beautiful appearance.
Successful glass tile installation requires meticulous subfloor preparation. The substrate must be perfectly level and stable to prevent stress fractures in the glass. Even minor variations can create stress points that lead to cracking over time. Professional installers typically use self-leveling compounds to achieve the necessary flatness. Additionally, installing a crack suppression membrane is crucial this flexible barrier helps absorb minor movements in the substrate and provides additional waterproofing benefits, which is particularly important in Aurora homes that experience seasonal temperature fluctuations.
Flexible thinset mortar specifically designed for glass tiles is essential for successful installation. This type of adhesive provides the necessary bond strength while accommodating thermal expansion and contraction important factors in Aurora's climate with its temperature extremes. Avoid mastics and epoxy-based adhesives, as these products lack the flexibility required for glass tile applications and may fail prematurely. Proper application includes using the appropriately sized notched trowel and back-buttering each tile to guarantee 100% adhesive coverage, preventing hollow spots that could lead to cracking under load.
Cutting glass tiles requires specialized equipment and techniques. A high-quality wet saw equipped with a diamond blade designed specifically for glass provides the cleanest, most accurate cuts. The continuous water flow keeps the blade cool, reduces dust, and minimizes the risk of chipping. Safety is paramount eye protection is essential when cutting glass tiles, as flying particles can cause serious injury. Fresh edges remain extremely sharp after cutting, so they should be smoothed with fine-grit diamond hand pads before installation. At Creative Floors, our experienced team has the proper tools and expertise to handle glass tiles safely and achieve precise cuts for your Aurora home.
Not all grouts are suitable for glass tiles. Traditional sanded grouts may scratch the tile surface during installation, while some polymer-modified grouts may not cure properly against the non-porous glass surface. It's essential to select grout products specifically compatible with glass tiles. The grout should be applied carefully using diagonal strokes to ensure complete joint filling, and excess material must be cleaned frequently with a barely damp sponge. Because glass tiles are transparent or translucent, any residual grout haze becomes highly visible, making thorough cleaning during application critical. After the grout cures completely, applying an appropriate sealer protects the joints from moisture and staining.
The installation timeline depends on your project size, but proper curing periods are non-negotiable for successful results. After tile installation, the adhesive must cure for 24 to 48 hours before grouting operations begin. Environmental factors such as temperature and humidity in your Aurora home may extend the required curing time. After grouting, additional curing time is necessary before the floor can handle foot traffic. While this may seem lengthy, rushing these stages can compromise bond strength and lead to failures. At Creative Floors, we prioritize proper curing procedures to ensure your glass tile installation achieves long-term performance and maintains its beauty for years to come.
Glass tiles are actually one of the easiest flooring materials to maintain. Their non-porous nature makes them naturally resistant to stains, moisture, and bacterial growth perfect for Aurora-area bathrooms, kitchens, and other high-moisture environments. Regular maintenance typically requires only standard cleaning products and techniques. Simply wipe or mop with appropriate cleaners to keep your glass tiles looking pristine. Unlike porous materials that require special sealants and treatments, glass tiles maintain their appearance with minimal effort, making them an excellent choice for busy households.
Professional installation is highly recommended for glass tile projects. The specialized requirements for substrate preparation, adhesive selection, cutting techniques, and handling procedures make this a job best left to experienced installers. Improper installation can result in cracked tiles, poor adhesion, visible imperfections, and premature failure costly mistakes that negate the investment in premium materials. At Creative Floors Inc., our experienced team understands the unique challenges that glass tiles present. We bring the knowledge, specialized tools, and proven techniques necessary to ensure your glass tile project achieves both stunning visual impact and long-term performance. Contact us today at (630) 537-1047 to schedule a free in-home estimate and discover how glass tiles can transform your Aurora home.